Detailed Halloween coloring pages for adults offer more than tiny spaces to fill. A witch crossing a pumpkin field, a cat beside a moonlit cottage, or a skeleton in a decorated parlor can hold several connected details and a story to discover. The best way to enjoy that richness is to decide what deserves attention first, keep the palette manageable, and work in sections rather than treating the whole page as one assignment.
Colorists do not all want the same level of complexity. Recent discussions in adult-coloring communities include requests for intricate illustrations as well as pages between very simple “bold and easy” art and extremely dense patterns. These conversations are qualitative signals, not search-volume measurements, but they underline why page previews and clear descriptions matter. See discussions about finding more detailed styles and the middle ground between simple and intricate pages.
What “detailed” means in a Halloween coloring page
Detail can come from different parts of an illustration. Knowing which kind you enjoy helps you choose a page that feels absorbing rather than crowded.
- Story detail: several objects work together in one scene—a witch, her cat, a cottage, and a pumpkin path. The pleasure comes from following the setting.
- Surface detail: fabric patterns, roof shingles, wood grain, leaves, or small decorative marks add texture to larger objects.
- Repeated detail: windows, stars, pumpkin ribs, or border motifs create a steady rhythm as you color.
- Fine detail: narrow spaces and delicate outlines reward a sharp pencil or a controlled digital zoom.
A page may be rich in story while still having broad shapes. Conversely, a simple mandala can contain many tiny sections without depicting a scene. “Detailed” is therefore a useful starting label, not a complete description. Look at a preview and notice whether you prefer objects to inspect, patterns to repeat, or very small regions to shade.
Choose a page with a readable focal point
In a strong story illustration, your eye can usually find one place to begin: a face, a bright pumpkin, a window, a moon, or a lantern. Supporting details make the scene interesting, but they should not all compete equally. Before choosing a page, ask:
- What catches my eye first? If there is no clear focal point, decide whether you enjoy exploring an all-over pattern or would rather choose a more directional scene.
- Are there a few larger areas? A mix of broad shapes and fine accents gives you more than one pace to color.
- Can I recognize the objects? Clear outlines help distinguish a leaf from a sleeve or a roof tile from a decorative squiggle.
- Do I like the background? Trees, fences, clouds, and windows can be a major part of the fun in a vintage Halloween illustration.
If you want a wider comparison between easy, medium, and intricate artwork, read our guide to Halloween coloring pages by difficulty. This article focuses on how to approach the layered pages once you have chosen one.
Read the illustration before picking colors
Spend a minute looking over the entire image before opening every pencil or marker. Identify the main subject, the setting, and two or three repeated details. A story scene might have a witch as the focal point, a moon and sky behind her, and small pumpkins repeated along the ground. That gives you a simple visual map.
Choose one area to receive the strongest contrast. For example, keep the witch’s hat dark against a lighter moon, or make a carved pumpkin glow against a muted field. Let nearby objects support that focal point with softer colors. This creates hierarchy without requiring advanced drawing knowledge or exact realism.
Try to avoid making every object equally bright and saturated. If the sky, clothing, pumpkins, leaves, cat, and house all compete for attention, the scene can lose depth. Repeat a few colors across the picture instead: a plum hat can echo in a distant shadow; a warm gold window can echo in the pumpkin light.
Build a limited palette for a layered scene
A palette of five to seven colors is enough for many Halloween pages. Begin with a light, middle, and dark value for the main subject, then add one background color, one neutral, and one small accent. For example:
- Harvest story: golden cream, pumpkin orange, rust, olive, cocoa brown, and charcoal.
- Moonlit witch: pale yellow, dusty lavender, deep plum, blue-gray, moss green, and warm cream.
- Vintage postcard: faded coral, muted teal, old gold, soft sage, sepia, and ink-black.
Use the palest color to reserve light, the middle tones for most surfaces, and the deepest tone in a few folds, corners, or cast shadows. Then repeat the accent in small places so it feels intentional. Our guide to pumpkin, midnight, and vintage Halloween palettes includes more combinations and subject-specific ideas.
Color in zones, not all at once
Complex pages are easier to return to when you divide them into natural zones: the main character, nearby objects, distant setting, and decorative details. Finish one small zone or establish its base colors, then move on. You do not need to complete an entire object before taking a break.
- Start with a low-risk area. A leaf, distant cloud, or small border lets you test the palette before reaching the focal object.
- Lay in the main colors. Color larger shapes first, keeping the lightest areas open for highlights.
- Add a few shadows. Choose one consistent direction for the light and deepen only the folds and edges that help the form read.
- Return to the focal point. Add the strongest contrast or a small bright accent where you want the eye to land.
- Finish selectively. Pick a handful of tiny details to emphasize. Leaving some line art untouched can make the finished parts stand out.
This order is flexible. If you enjoy coloring backgrounds first, begin there. The point is to give the page a structure that suits you, not to follow a single correct method.
Match the tools to the linework
Colored pencils are forgiving for intricate work because you can layer gradually, soften a shadow, or add texture without filling every section in one pass. Keep one pencil sharp for narrow areas and use lighter pressure until you know how the paper responds. Our guide to coloring Halloween pages with colored pencils walks through layering and simple shading.
Markers give a bolder finish, but narrow spaces and thin paper need care. Test the exact marker on the same paper, place a protective sheet underneath, and avoid flooding a small section. For a step-by-step method, see how to color Halloween pages with alcohol markers. Fine-tip tools are useful for accents, while pencils can add softer shadows over a marker base if the materials are compatible.
Digital coloring offers another way to work on small regions: zoom in for a detail, zoom out to check the overall balance, and undo a color choice if needed. Use the scale controls as a convenience, then return to the full scene periodically so the details still belong to one composition.
A practical example: a witch above a pumpkin field
Imagine a vintage scene with a witch flying over a field, trees on the horizon, clouds around a large moon, and pumpkins in the foreground. Begin by making the moon pale cream and the sky muted blue-gray or plum. Keep the witch’s hat and cloak darker so her silhouette reads clearly. Give the pumpkins warm orange centers with rust shadows, then repeat a little gold in the windows or stars.
Let the foreground carry more contrast than the distant hills. Use softer greens and browns in the background, then choose a few leaves and pumpkin stems for crisp accents. The scene now has depth, but the palette remains controlled. If you want a different mood, keep the same values and change the hues: a teal night, a sepia postcard, or a rose-and-plum twilight can all tell a different story.
Let a detailed page take more than one sitting
A richly layered adult coloring page may take longer than one evening. Before you stop, note the colors you used and choose the next zone. A small swatch strip or a saved digital palette can help you resume without reconstructing every choice. You can also photograph a paper page in progress for reference, if that helps you keep the color relationships consistent.
Do not measure a session only by whether the whole page is finished. A colored focal object, a completed sky, or a balanced first layer is real progress. If you are deciding whether a book’s style fits you, our guide to choosing a Halloween coloring book for adults explains how to compare detail, subject, format, and sample pages before committing.
Frequently asked questions
What makes a Halloween coloring page detailed?
A detailed page often has multiple layers, smaller enclosed spaces, decorative patterns, or background elements. It does not have to make every space tiny; a story scene can feel intricate while keeping its main shapes open.
Are detailed Halloween coloring pages only for experienced colorists?
No. Start with a small palette, color one section at a time, and leave details for later if you want. You can stop at a natural point and return to the page another day.
What tools work best for intricate Halloween coloring pages?
Colored pencils are versatile for layering and small areas. Fine-tip markers can work when paper and line spacing suit them. Digital coloring tools can make small regions easier to reach with zoom.
How do I keep a detailed page from looking too busy?
Choose one focal object, limit the palette, repeat a few accent colors, and leave some areas quieter. Stronger contrast near the focal point helps the eye find its way through the scene.
How long does a detailed Halloween page take?
There is no standard time. A layered scene may take multiple short sessions, especially if you add shading or patterns. Choose a stopping point that feels natural rather than rushing to finish.
Color a story, one detail at a time.
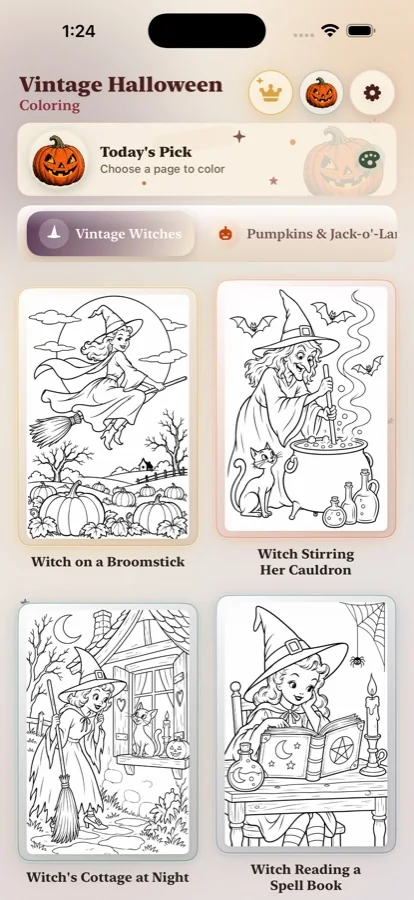
Explore nostalgic witches, pumpkins, cats, and moonlit scenes in Vintage Halloween Coloring for iPhone.