The best markers for Halloween coloring pages are not necessarily the markers with the biggest color range. They are the markers that match your paper, your patience, and the finish you want. A smooth alcohol marker can make a pumpkin glow in seconds, but it may bleed through thin copy paper. A water-based marker is often easier to control on a printable page, while a fine-tip pen can bring life to spiderwebs, lettering, buttons, and tiny stars.
Halloween coloring is a particularly good match for markers because the season welcomes strong, graphic color. Orange pumpkins, violet skies, black cats, mossy branches, and warm windows can look wonderfully bold. The challenge is keeping that energy under control when the page contains small sections or delicate line art.
This guide focuses on the practical questions colorists ask before buying a set: which marker type to choose, how to select paper, how to test for bleed-through, which tip works for which area, and how to create depth without turning every section into a flat block of ink.
What should you look for in markers for Halloween coloring?
Start with the page, not the product box. Halloween coloring pages range from large friendly pumpkins to intricate adult scenes with narrow spaces, layered backgrounds, and fine line work. The best marker for one page may be frustrating on another.
- Ink behavior: decide whether you want fast saturation, gentle layering, or the ability to reactivate and blend.
- Tip control: a fine or bullet tip is useful for small spaces; a brush or chisel tip covers broad shapes quickly.
- Bleed risk: alcohol ink usually moves farther through paper than water-based ink, especially on thin sheets.
- Color consistency: a reliable set makes repeated accents, such as windows or pumpkins, easier to match.
- Drying and smearing: some inks dry quickly but can streak when you return to a partly dry area.
- Comfort: an ergonomic barrel matters when you color a detailed page for a long evening.
There is no universal “best marker.” There is only the best match for the page in front of you. This is why marker guides that compare products by use case are more helpful than a single ranking. Your main decision is usually the trade-off between smooth blending and the risk of bleed-through.
Alcohol markers: rich color and smooth blending
Alcohol markers are popular because they lay down vivid color and can create smooth transitions when two shades overlap while still wet. They are excellent for large pumpkin sections, skies, costumes, backgrounds, and other areas where you want a clean, confident fill.
The same ink flow creates their main limitation. Alcohol markers can bleed through ordinary printer paper and many thin coloring books. The ink may also feather slightly beyond a small outline if you move slowly or press too hard. For that reason, use them on single-sided pages, marker-friendly paper, or a printed page you are willing to sacrifice on the back.
If you choose alcohol markers, always place a clean backing sheet under the page. A sheet of cardstock or a disposable pad protects the next surface, but it does not stop the ink from passing through the artwork itself. Test one representative page before coloring a favorite illustration.
Water-based markers: a practical printable-page choice
Water-based markers are often the safer starting point for ordinary printable Halloween coloring pages. They usually have a lower bleed risk than alcohol markers, though “water-based” does not mean bleed-proof. Thin paper can still show color through, especially if you go over one area repeatedly.
These markers work well for bold outlines, simple pages, classroom activities, cards, and shared tables. They are also easier to clean up in many everyday situations. The trade-off is that broad areas may show streaks if the ink begins to dry before you finish the section.
To keep a water-based fill smooth, work in a consistent direction, keep the tip moving, and avoid repeatedly touching half-dry areas. If you need a blended look, use two colors while the first is still workable or switch to colored pencils for the second layer. Our guide to colored pencils for Halloween pages explains why pencils are useful for controlled shading.
Brush, bullet, chisel, and fine tips
The tip determines how a marker feels on a detailed page. A dual-tip set can be especially useful because Halloween scenes often mix broad shapes with tiny decorative details.
| Tip | Best for | Watch out for |
|---|---|---|
| Brush | Large shapes, expressive strokes, curved clothing and backgrounds | Pressure changes the line width; narrow spaces can be difficult |
| Bullet | General coloring, medium shapes, controlled fills | May leave visible strokes on large flat areas |
| Fine | Spiderwebs, lettering, borders, stars, tiny accessories | Slow filling can make broad areas streaky |
| Chisel | Fast coverage, straight edges, architectural shapes | The corner can catch small sections or jump across an outline |
For an intricate adult Halloween page, a fine tip plus colored pencils is a flexible combination. Use markers for small areas that need strong color, then use pencils for shadows and texture. For a bold page with large closed shapes, brush or bullet tips can make the session faster and more satisfying.
Paper is the real secret to avoiding bleed-through
Marker performance depends heavily on paper. Smooth marker paper gives alcohol ink room to move, while printer-friendly cardstock can provide a useful compromise between print quality and resistance. Ordinary copy paper is fine for testing, but it is the least forgiving surface for saturated markers.
When choosing paper for a printable Halloween coloring page, consider four things:
- Thickness: heavier paper usually delays show-through, but thickness alone does not guarantee marker compatibility.
- Surface: smooth paper helps even fills; rough paper can make tips drag and outlines harder to respect.
- Printer fit: very heavy stock may not feed reliably through a home printer.
- Page format: single-sided pages are safer than bound double-sided books when you use wet markers.
The most reliable test is practical: print the exact line art on the exact paper, use the exact marker, and place a backing sheet beneath it. Test a dark orange, a navy, and a pale color because ink behavior can vary across the set. The Halloween printable PDF guide can help with page sizing and printer settings.
Even a good sheet may show a little shadow on the back. That is not always a problem if the page is single-sided. What matters is whether the ink damages a second illustration, feathers beyond the outline, or makes the page buckle so much that coloring becomes uncomfortable.
How to test markers before coloring a favorite page
A five-minute test can save an entire evening. Draw or print a small sample containing a large pumpkin, a narrow stripe, a curved outline, and a pale background. Then use the same strokes you expect to use on the real page.
- Fill one section quickly and one section slowly.
- Test a second layer after the first has dried.
- Place the page on clean white paper to check show-through.
- Look for feathering at corners and intersections.
- Check whether the ink smears when your hand passes over it.
- Write the marker name or number beside the swatch.
Do not trust the phrase “no bleed” without testing. Paper weight, printer ink, pressure, and the number of passes all change the outcome. A marker that behaves perfectly on coated marker paper may bleed immediately on a home-printed coloring page.
How to color Halloween pages with markers
Markers reward decisions made before the tip touches the paper. Choose a small palette, decide which areas should be darkest, and identify the light source. If you make every object equally bright, the page can lose its focal point.
- Swatch first: test colors on the actual paper.
- Choose a palette: three to six colors are enough for a coherent first pass.
- Color the lightest areas: pale yellows, creams, and soft grays are easier to protect than to add later.
- Work from large shapes to small details: this establishes the mood before you decorate.
- Respect drying time: wait before adding a second layer when the first is still wet and likely to spread.
- Finish with accents: use a fine tip, white gel pen, or colored pencil for stars, highlights, and tiny marks.
Keep a scrap sheet nearby to remove excess ink from the tip. If a color starts behaving differently, it may be contaminated by a darker area or drying unevenly. A quick clean stroke on scrap paper can restore control.
Marker techniques for classic Halloween subjects
Pumpkins and jack-o-lanterns
Use a light orange as the base, a darker rust or red-orange in the grooves, and brown around the stem. For a glowing jack-o-lantern, reserve the facial openings for pale yellow and add a darker orange around the carved edges. Work in curved sections that follow the pumpkin’s form rather than using straight horizontal strokes.
Moonlit backgrounds
Markers can create a strong night sky, but large dark areas are where bleed risk and streaking become most visible. Build the sky in adjacent bands, keep your strokes consistent, and use a backing sheet. A colored pencil over a dry marker can add texture without saturating the paper again.
Witches, hats, and costumes
Choose one main costume color and one shadow color. A violet hat can use plum at the underside and muted lavender on the turned edge. A black cloak can be charcoal, navy, or deep green rather than a single flat black. Leave the ribbon or buckle lighter so it remains readable.
Black cats and ravens
Use a fine tip around the silhouette, then fill with a bullet or brush tip where the space is large enough. Add a cool blue or plum shadow to keep the animal dimensional. Small warm eyes, a gold collar, or a moonlit rim can become the focal point.
Ghosts and pale details
Do not feel obliged to fill every white space. A pale gray, blue, or warm cream along the edge can suggest form while keeping the ghost luminous. The untouched paper becomes part of the palette.
Alcohol markers versus water-based markers
Choose alcohol markers when smooth blends, bold saturation, and single-sided marker-friendly pages matter most. Choose water-based markers when you need lower risk on ordinary paper, easier cleanup, or a tool that works well for group activities and lighter fills.
Neither category is automatically better for adult coloring. The decision depends on whether you prefer a polished gradient or a more graphic, illustrated mark. Many colorists combine markers with colored pencils: the marker establishes the base color, and pencil adds texture, shadow, and small transitions without soaking the page.
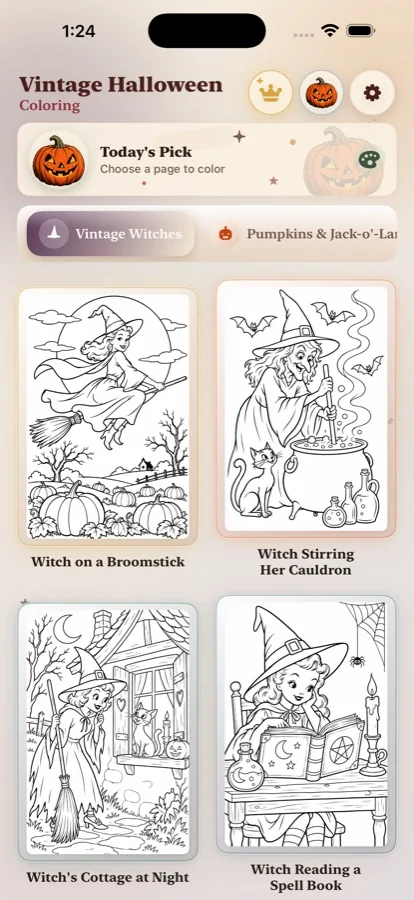
For a digital alternative with no paper limitations, see our guide to Halloween coloring apps for iPhone. Vintage Halloween Coloring lets you experiment with a seasonal palette, undo a decision, and color without preparing a printer or protecting the page behind it.
Build an autumn marker palette
A large marker set is not required for a vintage Halloween feeling. Start with a few relationships instead of chasing every shade:
- Harvest: pumpkin orange, rust, ochre, olive, cream, and walnut.
- Midnight: navy, blue-violet, plum, charcoal, pale yellow, and cool gray.
- Vintage: burnt orange, dusty teal, brick red, parchment, moss, and dark brown.
- Cozy spooky: muted peach, sage, cocoa, faded lavender, butter yellow, and warm gray.
Repeat one accent color in several places. A pale gold moon can echo in a window and a buckle. A dusty teal sky can appear again in a ribbon or pumpkin shadow. This is an easy way to make a page feel designed rather than randomly filled. Our article on Halloween coloring book color palettes goes deeper into pumpkin, midnight, and vintage combinations.
Common marker mistakes and how to fix them
Pressing too hard
Heavy pressure puts down more ink, but it can make streaks, feathering, and bleed-through worse. Let the marker do the work. Add a second pass only when the surface is ready.
Using alcohol markers on double-sided pages
If the back page matters, test first or choose a drier tool. A backing sheet protects the next page from staining, but it cannot prevent alcohol ink from traveling through thin paper.
Starting with the darkest color
Dark ink is difficult to soften. Establish the light base first, then add shadow in a controlled area. This is especially important on pumpkins, faces, and pale clothing.
Coloring too slowly in a large area
Some water-based markers show bands when one part dries before the next part is filled. Work in manageable sections, keep the edge wet when possible, or use colored pencils for larger textured areas.
Skipping the swatch card
The cap color is not always the color on paper. Swatching reveals the real palette and helps you repeat the same accent throughout a scene.
Markers, colored pencils, or a digital coloring app?
Markers are a good choice when you want clear, graphic color and a quick sense of progress. Colored pencils are better for delicate layering, texture, and pages where the paper is thin or double-sided. A digital app is best when portability, undo, and unlimited experimentation matter more than physical materials.
| Choose markers when you want | Choose pencils or an app when you want |
|---|---|
| Bold, immediate color | Gradual shading and texture |
| Fast coverage on large shapes | Low bleed risk or easy undo |
| Strong poster-like accents | More forgiving small corrections |
| A vivid pumpkin or midnight sky | A portable or quieter setup |
You can also combine all three. Use markers for a base, colored pencils for shadows, and the iPhone app when you are away from the desk. The format should serve the mood rather than become another rule.
A safe and satisfying marker setup
Before you begin, put a protective sheet under the page, keep the cap on every marker you are not using, and work somewhere with enough ventilation if the ink has a strong smell. Let the page dry before stacking it with other artwork. Store markers horizontally when the manufacturer recommends it, and keep them away from direct heat.
Choose one page instead of opening a whole book. Pick a focal subject, swatch five colors, and decide where the darkest area will live. A small plan prevents the familiar feeling that a marker has taken over the image before you have decided what you want.
For a slower paper session, pair this setup with free Halloween coloring pages for adults. For a broader creative routine, see Halloween coloring for stress relief and quiet coloring evenings.
Final advice: test first, then color boldly
The best markers for Halloween coloring pages are the ones that respect the page. Match the ink to the paper, choose the tip to match the shape, and test before starting the illustration you care about most. Alcohol markers can give you beautiful saturated blends, water-based markers can be practical and flexible, and fine tips can turn a simple page into a collection of small discoveries.
Do not let bleed-through make markers feel intimidating. A backing sheet, a test swatch, and a suitable page solve most of the practical problems. The rest is a matter of deciding whether your Halloween should feel harvest-warm, midnight-dark, vintage, or playfully spooky.
Vintage Halloween Coloring is made for that atmosphere in a portable digital format. If you want to color without paper, markers, or cleanup, download the app from the official App Store page. If you want to keep working on paper, continue with our guides to colored pencils for Halloween coloring pages, printable Halloween PDFs, and seasonal color palettes.
Frequently asked questions
What are the best markers for Halloween coloring pages?
Choose markers that match your paper and finish. Water-based markers are a practical start for ordinary printable pages, while alcohol markers create smooth, saturated blends on suitable paper.
How can I stop markers from bleeding through?
Test the exact marker and paper, place a clean backing sheet behind the page, use single-sided pages when possible, and avoid saturating thin paper.
Are alcohol markers good for adult coloring books?
Yes, when used on marker-friendly or single-sided pages. They are risky for thin double-sided books because the ink can travel through the sheet.
Which tip is best for detailed pages?
Fine or bullet tips offer control in small spaces, while brush tips cover larger areas. Dual-tip sets are flexible when a page mixes both.