The right tools can change how a coloring page feels. When you search for the best colored pencils for Halloween coloring pages, you are not necessarily looking for the most expensive set or the largest number of colors. You are looking for pencils that feel comfortable in your hand, keep a useful point, layer without becoming scratchy, and give pumpkins, witches, cats, leaves, and moonlit scenes a sense of depth.
Halloween artwork is especially rewarding with colored pencils because the season has such a rich visual language. Orange can move from bright candlelight to burnt harvest skin. Black can become charcoal, navy, plum, or deep green. A gray ghost can be soft and warm rather than flat. With a small set and a little patience, you can make a free printable page feel personal and finished.
This guide explains what to look for, how different pencil types behave, which colors are useful for Halloween, and how to avoid the common problems that make a detailed coloring page feel harder than it needs to be.
What makes a colored pencil good for Halloween coloring?
A useful coloring pencil has four qualities: predictable color, comfortable pressure, a point that works for both edges and larger shapes, and enough layering capacity to create shadows. You do not need every shade in the rainbow. A well-chosen set of warm oranges, reds, browns, purples, blues, greens, creams, and neutrals will cover most vintage Halloween scenes.
- Control: the pencil should respond when you use light pressure and become richer when you build another layer.
- Blendability: nearby colors should overlap without leaving harsh gaps or excessive waxy shine.
- Point retention: fine details such as spiderwebs, buttons, stars, and roof lines need a reliable sharp point.
- Color range: useful dark neutrals and muted midtones matter as much as bright Halloween orange.
- Comfort: a pencil that feels tiring after ten minutes will not support a long coloring session.
Quality is relative to the page and the person coloring it. Bold, easy designs may look wonderful with inexpensive pencils. Highly detailed adult pages benefit from a core that can make delicate marks without breaking every few minutes. Start with the kind of coloring you actually enjoy instead of buying based on prestige.
Wax-based versus oil-based colored pencils
The two broad categories most colorists compare are wax-based and oil-based pencils. Both can produce beautiful Halloween coloring pages, and many people eventually enjoy having a mixture. The important difference is how the core lays down color and reacts to pressure.
| Type | Strengths | Good for | Keep in mind |
|---|---|---|---|
| Wax-based | Soft, blendable, easy to layer | Pumpkins, skies, costumes, broad areas | Can develop shine or wax bloom with heavy pressure |
| Oil-based | Firm point, controlled detail, gradual layering | Line work, hair, branches, small decorations | May need more patience to blend smoothly |
| Water-soluble | Can be used dry or activated with water | Experimental washes and atmospheric backgrounds | Requires suitable paper and careful moisture |
For a first set, wax-based pencils are often the easiest place to begin because they respond well to light layers and soft blending. Oil-based pencils are appealing if you love fine detail and want a point that stays sharper. Neither choice is automatically “professional.” The best pencil is the one that helps you make the marks you want.
How many colors do you really need?
A 12-color set can be enough for a simple Halloween page, especially when you learn to mix visually through layering. A 24-color set gives you more room for muted greens, violets, warm grays, and multiple pumpkin shades. A larger set is useful when you color frequently, but it can also create decision fatigue.
Before buying more pencils, make a swatch card. Write the color name or number beside a small rectangle and test it on the same paper you use for coloring. Many pencil barrels do not show the true result. A swatch card also reveals which colors are too similar and which combinations produce a useful shadow.
For Halloween, prioritize:
- two or three oranges, from light pumpkin to burnt orange;
- brick red, muted rose, or deep rust for vintage accents;
- cream, warm gray, and parchment for paper, ghosts, and highlights;
- dark brown, charcoal, navy, and plum for outlines and shadows;
- forest, olive, or moss green for leaves, vines, and magical details;
- one pale yellow or gold for moons, windows, stars, and candlelight.
These colors create far more atmosphere than a set made entirely of bright primary hues. For a full palette strategy, explore our guide to pumpkin, midnight, and vintage tones.
Choose paper before judging the pencil
Paper affects the pencil more than many beginners expect. A soft pencil on thin copy paper may look smooth for a few minutes and then become shiny or unable to accept another layer. A very rough sheet can make small areas of Halloween line art look uneven. The goal is a smooth surface with enough tooth to hold several light applications of color.
For ordinary colored pencils, good-quality printer paper can be perfectly adequate. If you want to blend, layer, or use a softer artist pencil, choose a heavier drawing paper or smooth mixed-media sheet. If your page comes as a printable PDF, check whether it is formatted for US Letter or A4 before printing. Our printable PDF guide covers sizing and printer settings in more detail.
- Print one test page first.
- Color a pumpkin, a dark area, and a small detail.
- Try two or three layers without pressing hard.
- Check whether the paper pills, shines, buckles, or stops accepting color.
- Only then print the rest of the collection.
If you use markers with your pencils, place a protective sheet underneath. Alcohol markers can bleed through even heavier pages, while water-based markers may buckle the surface. Paper choice is not about finding a perfect product; it is about matching the surface to the tool.
Layering: the most useful Halloween coloring technique
Layering means building color gradually instead of trying to fill a shape with one heavy application. It is the easiest way to make a pumpkin round, a cloak dimensional, or a night sky atmospheric.
- Start lightly: apply the base color with small circular strokes or strokes that follow the object’s shape.
- Place the shadow: add a darker version of the color along one edge, under a fold, or beside another object.
- Soften the transition: use the base color again over the boundary with light pressure.
- Repeat if needed: add one more layer rather than pressing harder immediately.
- Protect the highlight: leave a small area of paper visible or return with a white pencil later.
On a pumpkin, let the strokes curve from the stem toward the bottom. On a witch’s cloak, follow the folds. On a tree branch, use the natural direction of the wood. Directional strokes make the surface feel intentional even before you add a second color.
How to shade classic Halloween subjects
Pumpkins and jack-o-lanterns
Begin with light orange, then place burnt orange or rust in the grooves between sections. Add brown near the stem and underneath the pumpkin where it meets the ground. A small amount of cream or pale yellow on the upper curve suggests a glow. If the pumpkin is carved, use a warm yellow inside the face and a darker orange around the opening.
Black cats and ravens
Do not fill every dark animal with one black pencil. Layer charcoal, navy, plum, and dark green so the silhouette keeps its shape. Leave a narrow rim of lighter color where moonlight would catch fur or feathers. Warm brown can make a black cat feel softer and more vintage.
Witch hats and clothing
Use one dark color for the deepest fold and a related midtone for the larger fabric. A purple hat can have plum shadows and muted lavender highlights. A brown coat can move through walnut, rust, and warm gray. Keep the buckle, ribbon, or stitch detail lighter so the costume does not become a single block.
Ghosts and pale objects
White paper is not unfinished. For a ghost, use a very light gray, blue, lavender, or warm cream along the edges, then leave the center mostly open. Add a small shadow beneath the ghost or behind a fold. The contrast will make the untouched paper feel luminous.
Moonlit skies and haunted houses
Build the sky from the outer edge inward with navy, indigo, and plum. Keep the area around the moon lighter. For a house, use charcoal or dark brown for the structure and warm yellow for a few windows. Repeating the same window color elsewhere in the page creates a connected atmosphere.
Blending without losing the line art
Blending does not mean making every transition perfectly smooth. In coloring books, a little pencil texture can be part of the charm. If you want a softer transition, use the lighter of two colors over the boundary. A colorless blender can help, but it is not essential and may burnish the paper too early.
White pencils are useful for soft highlights, but they work best after you have established the darker layers. A cream pencil often looks more natural than bright white on vintage Halloween artwork. For tiny stars, candle flames, and magical sparks, a white gel pen can provide a clean final accent.
Keep your pressure light until the end. Heavy pressure compresses the tooth of the paper and leaves less room for additional color. If a section becomes shiny, move to another area and let the page rest. Sometimes the surface looks more balanced after you return with a darker detail rather than trying to force another layer.
Budget pencils can make beautiful Halloween art
It is easy to believe that a high-priced set is required for adult coloring pages. It is not. Budget pencils can produce beautiful results when the paper is decent, the point is sharp, and the colorist builds layers patiently. The biggest difference between sets is often comfort, pigment intensity, and how easily colors blend—not whether a page can look good at all.
If you are starting, buy a small set and learn its behavior. Add individual colors only when you notice a real gap, such as needing a better dark brown or a warmer pale yellow. This approach is more useful than owning dozens of near-identical oranges that rarely leave the box.
For a quiet evening, the ritual matters as much as the materials. Sharpen two or three pencils, put the rest nearby, and choose one page. Fewer options can make it easier to begin.
Colored pencils versus digital coloring
Paper coloring offers tactile resistance, visible layering, and a physical page you can keep, gift, or display. It is especially satisfying when you enjoy the sound of a pencil, the feel of the paper, and the gradual change in a small area.
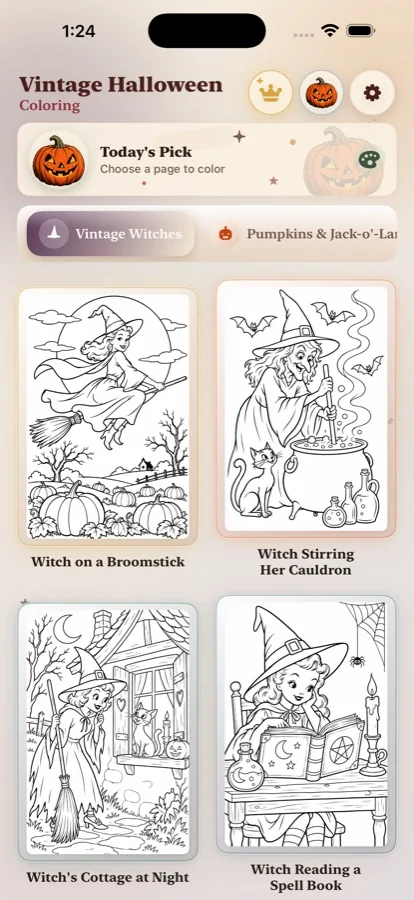
Digital coloring is useful when you want portability, undo, easy palette changes, and no preparation. A Halloween coloring app can be a good companion on a train, during a short break, or on an evening when you do not want to set up a desk. Compare the formats in our online versus printable coloring guide or read our dedicated guide to a Halloween coloring app for iPhone.
Many colorists enjoy both. Use the app to test a midnight palette, then bring the idea to a printed witch or pumpkin page. Or print for a group and keep a private digital page for your own slower projects.
A simple setup for a relaxing coloring session
You do not need a large studio. A stable surface, comfortable light, a sharpener, an eraser, and a small pencil set are enough. Put a blank sheet beneath your hand to protect the page from oils and prevent unwanted smudges.
- Choose one page rather than an entire stack.
- Swatch the colors before touching the illustration.
- Start with the largest or most familiar shape.
- Use a limited palette for the first ten minutes.
- Take a break before finishing every detail.
The best Halloween coloring session is not the one with the most advanced technique. It is the one you can return to. If you want to make the ritual even quieter, combine this setup with our stress-relief coloring ideas and our guide to quiet autumn evenings.
Final recommendation: choose control over hype
The best colored pencils for Halloween coloring pages are the pencils that let you control the mood. Start with a small, balanced set. Use a paper that accepts light layers. Test the colors before committing. Build shadows slowly, keep highlights open, and let a dark cat be more than flat black.
You do not need to recreate someone else’s finished page. A vintage witch can wear blue instead of purple. A pumpkin patch can glow with muted rose. A ghost can be warm cream. Coloring is the moment when line art becomes your version of the season.
Vintage Halloween Coloring is made for that same sense of discovery: nostalgic scenes, expressive characters, and enough detail to reward a slower look. If you prefer a digital coloring book tonight, download Vintage Halloween Coloring on the App Store. If you are working on paper, continue with our guides to free Halloween coloring pages for adults, seasonal color palettes, and choosing an adult Halloween coloring book.
Frequently asked questions
What are the best colored pencils for Halloween coloring pages?
Choose pencils that feel comfortable, offer useful warm and dark colors, and layer without becoming scratchy. A small student-grade set can be excellent for beginners.
Are wax-based or oil-based pencils better?
Wax-based pencils are often softer and easier to blend, while oil-based pencils hold a sharper point for detail. Neither type is universally better.
What paper should I use?
Use smooth, reasonably thick paper with enough tooth for several light layers. Test it with your chosen pencils before printing a full collection.
How do I shade pumpkins and costumes?
Start with a light base, add a darker shade along edges and folds, then blend gradually. Leave a highlight open or add it later with a white pencil or gel pen.