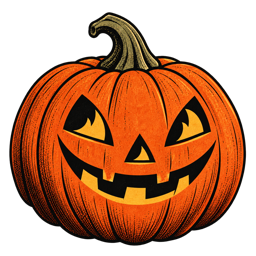
A Halloween coloring page does not have to end when the last section is filled. With a little cardstock, string, glue, or a frame, a finished page can become a decoration that stays in the room for the whole season. Turning coloring into a craft gives children and adults a second creative decision: what should this picture become now?
A pumpkin can become a gift tag. A friendly ghost can become a window decoration. A row of black cats can become a garland. A detailed witch or haunted cottage can be framed like a small vintage poster. These projects are simple enough for a family evening, useful for a classroom or library table, and personal enough to make Halloween feel handmade rather than purchased.
Why combine Halloween coloring and crafts?
Coloring offers a calm way to begin a project because the page already provides a structure. Crafting gives that artwork a purpose. Together, they create a satisfying before-and-after rhythm: choose the page, color it, decide how to use it, then make something that can be displayed or given away.
This combination also works across ages. A toddler can color a large pumpkin while an adult cuts it out. A preschooler can decorate a ghost garland with help. An older child can design a layered haunted-house collage. A teenager or adult can turn a detailed page into a framed piece, card, or journal cover.
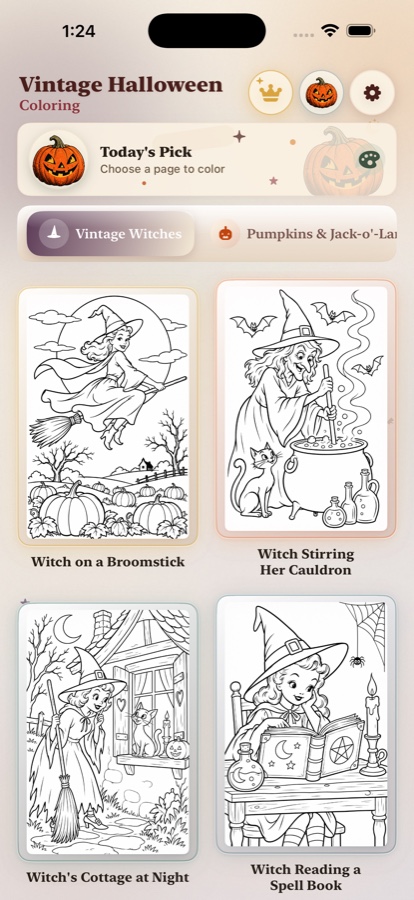
Start with our Halloween coloring pages collection and choose artwork by the final use. Large silhouettes are good for garlands and tags. Full scenes work well as posters. Small motifs are useful for cards, gift wrap, and collage.
1. Make a Halloween coloring page garland
A garland is one of the easiest ways to display several finished pages. Choose pumpkins, ghosts, bats, cats, or witch hats with clear silhouettes. Color them in a shared palette, then cut around each shape or keep a small border of paper.
Reinforce the back with cardstock if the paper feels thin. Punch two small holes near the top of each piece and thread string, ribbon, or twine through them. Leave space between the shapes so each picture can be seen. A mixed garland can feel playful; a single subject in several palettes can feel more like a vintage decoration.
For a family activity, let everyone color one or two pieces. The finished garland becomes a record of the evening because every pumpkin or ghost carries a different hand and color choice.
2. Turn a page into a Halloween card
Print a simple image at a smaller size or color a section of a larger page and use it as the front of a card. Fold cardstock in half, attach the colored art with glue or double-sided tape, and write a short message inside.
A pumpkin, cat, or friendly ghost works for a general “Happy Halloween” card. A quote page can become a more expressive message. Read our guide to Halloween quote coloring pages for ideas on combining lettering and seasonal artwork.
Cards are also a good way to include someone who does not live nearby. Ask the colorist to choose colors that remind them of the person receiving the card. The craft becomes a small act of attention rather than just a seasonal project.
3. Create gift tags and treat labels
Small sections of colored Halloween pages can become gift tags for treat bags, baked goods, candles, or autumn gifts. Look for a pumpkin face, bat, leaf, star, or cat that can stand alone. Cut it into a circle, rectangle, or simple outline, then punch a hole for ribbon.
Write the recipient's name on the blank side or add a short phrase such as “A little Halloween magic” or “Made for you.” If the artwork is detailed, leave the lettering simple. If the image is bold, use a decorative marker for the name.
For a more finished look, glue the colored shape onto a slightly larger piece of dark cardstock. The border acts like a frame and makes even ordinary printer paper feel intentional.
4. Build a window or wall display
Full-page coloring sheets can become an instant Halloween gallery. Choose a consistent paper size, color each piece with a related palette, and hang them in a grid or a loose row. Leave enough space between pages so each image has room to breathe.
A window display works best with simple silhouettes and lighter areas that let daylight through. Tape the pages from the corners or place them in inexpensive clear sleeves. For a wall, use clips or removable adhesive so the artwork can be changed throughout October.
Invite everyone to give their piece a title. “Moonlight Pumpkin,” “The Cat Who Knows,” or “A Very Busy Ghost” adds personality and turns the display into a tiny exhibition.
5. Make a Halloween table sign
A colored page can become a sign for a snack table, craft station, reading corner, or party game. Choose an image with open space and add words by hand after coloring. “Coloring Corner,” “Treats,” or “Pick a Page” are easy messages for a family gathering or classroom.
If the page is too busy for text, mount it on cardstock and attach a separate paper label. This preserves the artwork and keeps the sign readable. For a vintage look, use cream paper, dark brown lettering, and a rust or pumpkin accent.
6. Turn coloring pages into bookmarks
Bookmarks are a useful craft because they need only a narrow strip of artwork. Print a page with a border, crop a favorite section, or arrange several small Halloween motifs on one sheet. Cut a rectangle, round the corners, and reinforce it with cardstock or clear tape.
Add a ribbon, yarn, or a small paper tassel through a hole at the top. A witch hat, moon, bat, or black cat can peek over the edge of a book. Older children can write a seasonal quote on the back or create a tiny five-color palette for the front.
Use a bookmark project alongside a Halloween story or a library display. The coloring gives the activity a visual entry point, while the finished bookmark encourages the child to return to a book.
7. Create a cut-paper Halloween collage
For a collage, use several pages with different scales. Color a large moon, a pumpkin, a cat, a tree, and a few bats. Cut out the shapes and arrange them on dark blue or black paper. Layer the pieces so the foreground sits in front of the background.
Do not worry about exact cutting. A small white border can make the pieces look like vintage paper cutouts. Add stars, leaves, or handwritten words with a white or gold pencil. The collage can be flat, framed, or folded into a simple card.
This project is especially good for mixed ages. Younger children can color the shapes. Older children can plan the composition. Adults can help with cutting and discuss foreground, background, scale, and contrast.
8. Make a hanging pumpkin or ghost mobile
Choose three to five simple shapes and color them on both sides if they will rotate. Cut them out, reinforce the back, and attach each piece to a branch, embroidery hoop, or strip of cardstock with thread. Vary the lengths so the pieces hang at different heights.
A pumpkin mobile can use orange, cream, rust, and green. A ghost mobile can use warm white, lavender, pale blue, and charcoal. Add a few stars or leaves between the main shapes to create movement.
Hang the mobile well away from flames, heaters, and places where children could pull it down. The craft is decorative, but safe placement matters more than perfect balance.
9. Design a handmade Halloween party invitation
Color a small pumpkin, cat, witch, or haunted house and use it as the front of a party invitation. Add the date and details on a separate sheet or on the back. A family can make several versions together, then photograph the finished art for a digital invitation.
Quote coloring pages can be helpful here because a short phrase already creates a headline. Keep the rest of the information clear and easy to read. A strong illustration and a simple message often look more inviting than a crowded design.
Choose the right paper and coloring tools
Ordinary copy paper is fine for practice, but decorations benefit from heavier paper. Cardstock holds its shape for tags, garlands, signs, and bookmarks. If you plan to use markers, place scrap paper underneath or print on paper designed to reduce bleed-through.
Colored pencils are useful when the craft will be cut around detailed edges. Crayons create a cheerful handmade look. Broad markers make strong silhouettes for younger children, while fine-tip markers can add lettering or small accents for older colorists.
Before printing a large batch, test one page. Check the margins, contrast, and scale. Our Halloween coloring pages printable PDF guide covers practical choices for US Letter and A4 paper.
Craft ideas for different ages
For toddlers and preschoolers, keep the craft simple: color a pumpkin, add stickers, or let an adult cut out a ghost. Our guide to Halloween coloring pages for preschoolers and toddlers explains how to choose big shapes and friendly subjects.
For elementary children, try garlands, bookmarks, collages, and table signs. They can practice cutting, arranging, writing, and choosing a palette. For teens and adults, offer detailed scenes that can become framed art, journal covers, greeting cards, or a personal Halloween display. See Halloween coloring pages for teens and adults for ideas about mature artwork and mixed difficulty.
Make a family coloring-and-craft night
Choose a small set of pages, place the supplies in the middle of the table, and decide on one final project. Everyone can color independently for twenty minutes. Then spread the finished pages out and choose which ones will become cards, tags, garlands, or framed art.
Use a shared color suggestion rather than a strict rule. “Include one warm color” or “give every page one gold detail” creates a visual connection without taking away personal choices. Play music if the group enjoys it, but leave room for quiet too.
The best part of the evening is often the conversation that happens while hands are busy. People talk about favorite Halloween memories, invent stories for the characters, and notice details they would have missed on a screen.
Simple finishing touches
- Mount a finished page on dark cardstock to create an instant frame.
- Add a narrow washi-tape border around a card or sign.
- Use a white gel pen for stars, highlights, or tiny lettering.
- Write the artist's name and date on the back of a display piece.
- Photograph the finished craft before the season ends.
- Store reusable shapes in an envelope for next year's Halloween.
Small details can make the craft feel complete, but they are optional. The colored page remains the heart of the project.
Why handmade Halloween art lasts longer
Purchased decorations can create an immediate effect, but handmade pieces carry a different kind of warmth. A colored ghost remembers the person who chose purple. A pumpkin garland shows several different hands working on one idea. A bookmark can return every October with a favorite book.
Coloring pages make that warmth accessible because the first step is already there. You do not need to draw a perfect witch or design an elaborate pattern from nothing. You only need to choose a page, choose a color, and let the project grow.
Final thoughts
Halloween coloring pages are more versatile than they first appear. They can be a quiet activity, a learning prompt, a party table, or the raw material for handmade decoration. Once the page is colored, look at it again and ask what else it could become.
Cut out a pumpkin. Hang a ghost. Frame a cottage. Write a message on the back of a cat. Make a garland that records the colors your family chose this year. The craft does not need to be complicated to feel special. It only needs to leave a little evidence that someone made it with care.
Frequently asked questions about Halloween coloring page crafts
What crafts can you make with Halloween coloring pages?
You can make garlands, greeting cards, gift tags, bookmarks, table signs, window decorations, paper puppets, framed art, and simple collage scenes from colored Halloween pages.
What paper is best for Halloween coloring crafts?
Use ordinary paper for coloring practice and thicker paper or cardstock for decorations, cards, tags, and pieces that need to stand up or hang.
Can children use Halloween coloring pages for crafts?
Yes. Choose age-appropriate pages and supervise scissors, glue, hole punches, and other tools. Young children can color while an adult handles cutting or assembly.
How do I make a Halloween coloring page into a decoration?
Color the page, reinforce the back with cardstock if needed, cut around the main shape or keep the full sheet, then hang it with string, tape, clips, or a simple frame.